I searched far and wide but could not find one single specific article on configuring Android x86 running on VirtualBox such that we can intercept and monitor traffic using Burpsuite.
Also, GenyMotion for some weird reason did not work on my Linux Machine. I spent hours but finally gave up and used VirtualBox.
So,
To get started you should have already
- Installed BurpSuite free version
- Installed VirtualBox with Android x86 running (turn on USB debugging in developer settings)
To intercept traffic we need to install a CA cert on our Android Device. This certificate is provided by Burpsuite. By installing this certificate, burpsuite can access all the traffic (Especially HTTPs).
I am running this on my work computer, which means it is a private network that does not allow you to configure proxies to connect more devices. Best network configuration to go with would be the default configuration NAT.
Note: Before going ahead, test if you are able to access internet with all the default settings inside your VM.
Coming back,
Shutdown your VM and then go to Network -> Advanced settings -> Port Forwarding
Configure the settings as shown below.
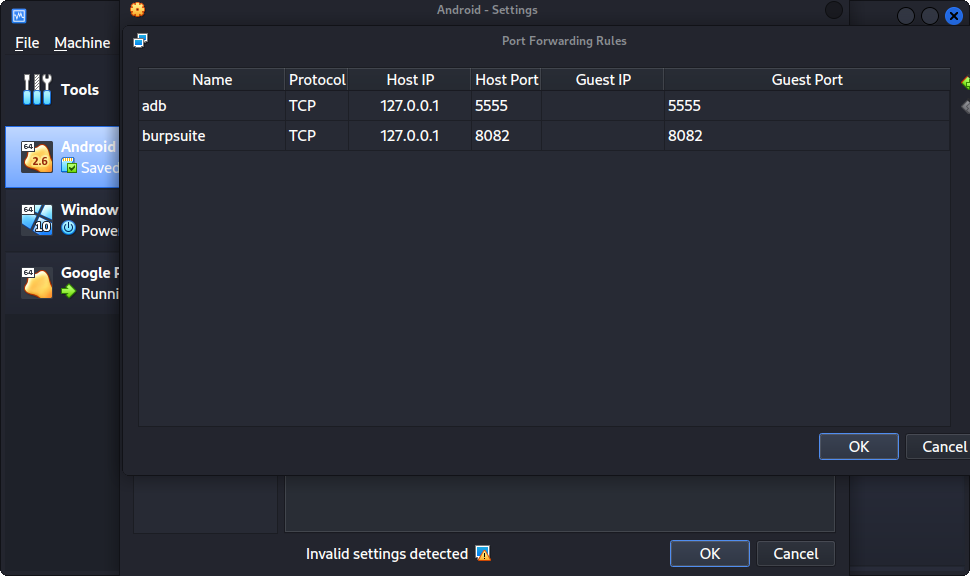
Once done, restart your VM and run the following commands
adb connect 127.0.0.1:5555
adb devices
adb root
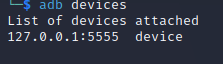
That’s out of the way.
Fire up your burpsuite and go to Proxy > Options
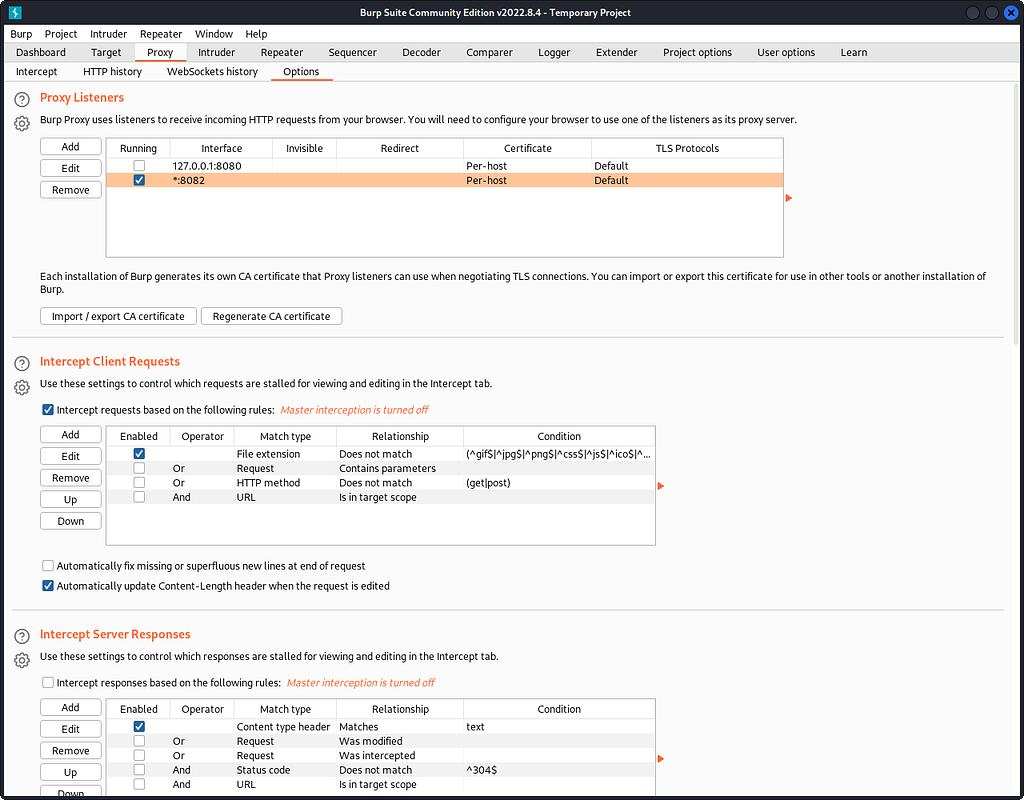
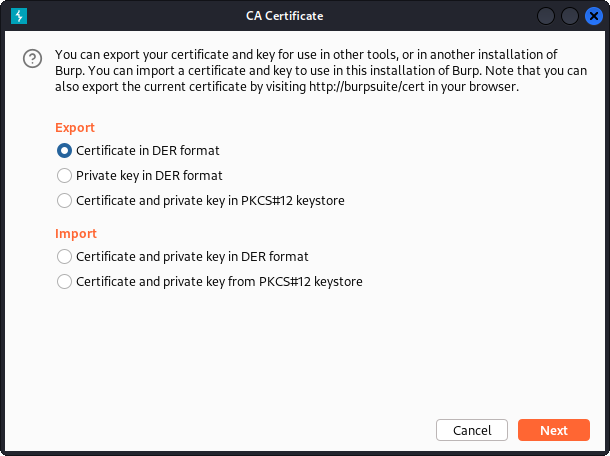
Click on Import/Export Certificates
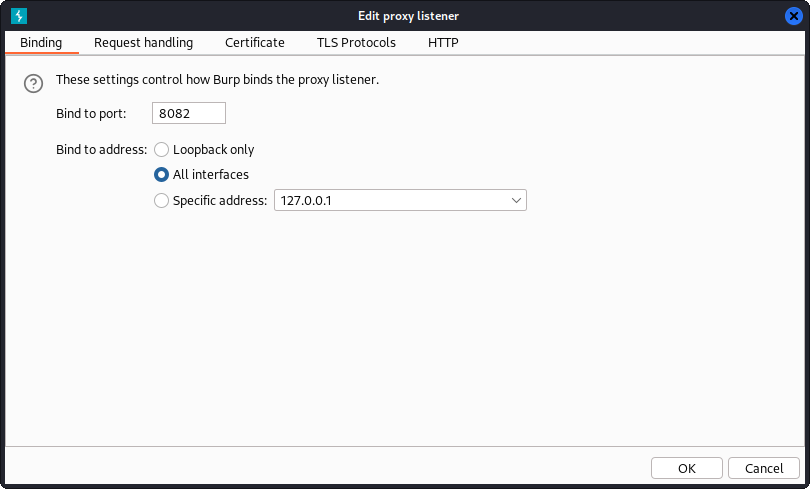
Next, configure the port setting as highlighted on the previous screen. This will capture all the traffic being sent through that port on any ip. Alternately, you can also choose to configure specific address. Choose the one from the drop-down that you use to configure port-forwarding in virtualbox.
Go to the directory where the certificate is saved and run the following command. This will convert .der to .pem
openssl x509 -inform DER -in cacert.der -out cacert.pem
We need to send this to our internal storage of VM.
adb push cacert.pem /data/local
We install this certificate using the below steps. Pretty self-explanatory.
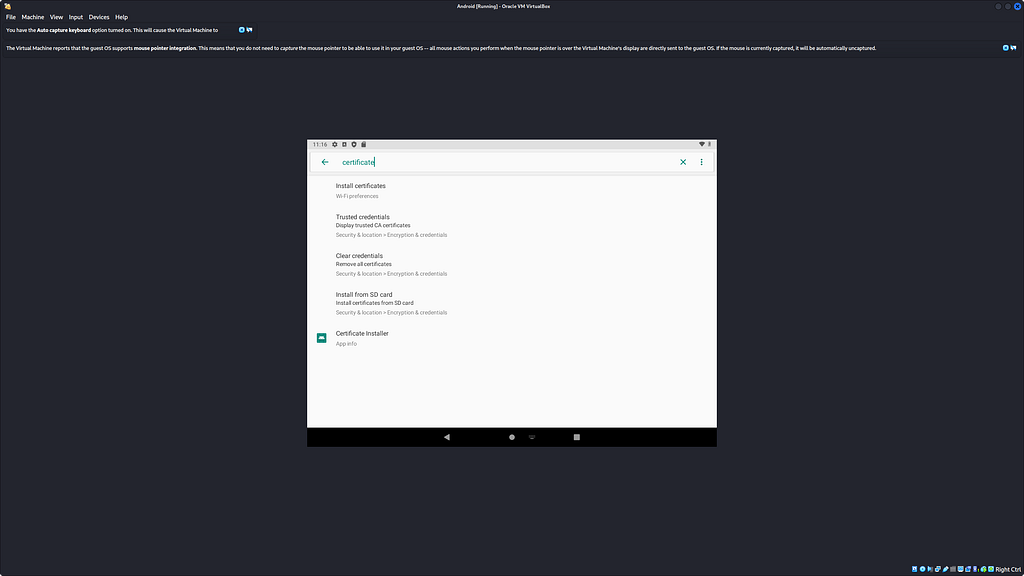
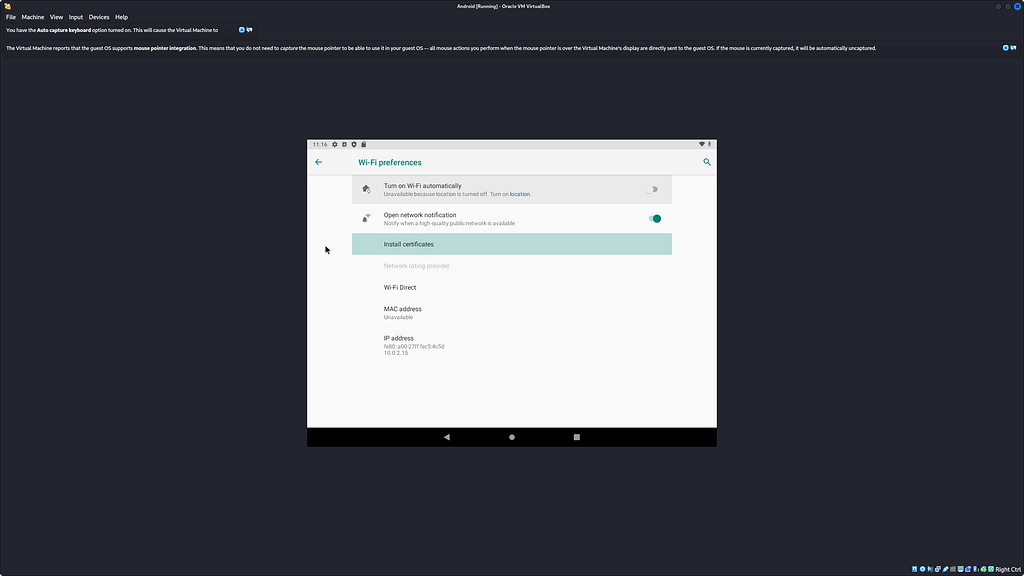
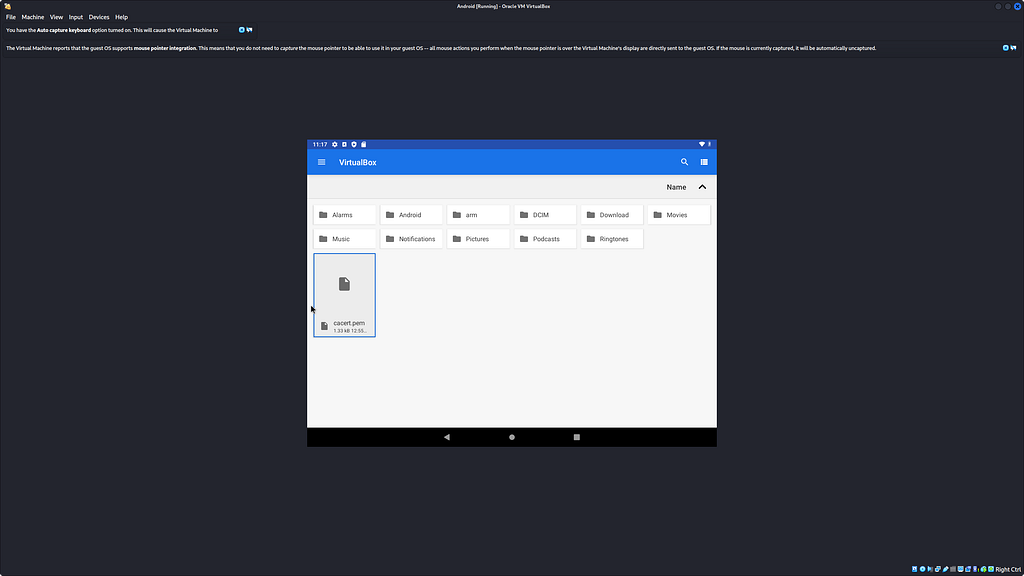
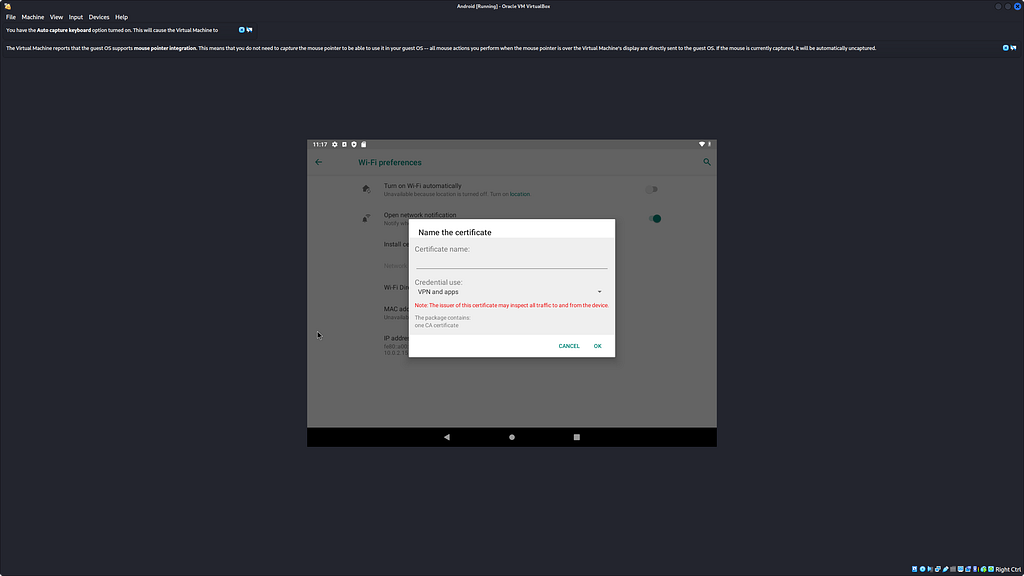
Give your certificate the name you want.
Go to google.com inside the VM and search for what’s my ip. You will use this IP to configure the proxy.
Go to WiFi settings edit the Virtual Wifi to Manually select Proxy.
Proxy hostname: <ip you found>
Proxy port: 8082
bypass proxy for: <any name>
Save the details and go back to the browser. Try to go to any url and test if VM is able to access internet.
If yes, you are good to go.
Open your burpsuite and see HTTP history and you will be able to see all the traffic.
If you have any doubts, problems or questions, please comment and I will get back to you.